Monthly Archives: November 2013

Ona Colasante: Homesteading Extraordinaire

Image

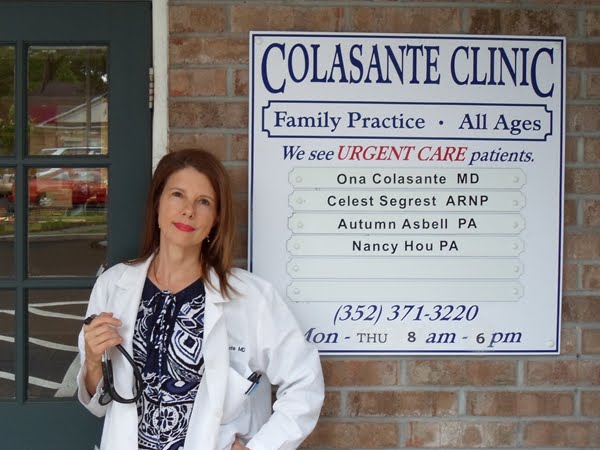
During Thanksgiving break, I was happy to escape the cold and head to Florida to visit my boyfriend. While there, I made my first trip to his mother’s house about 40 minutes away from where he resides in Gainesville. I was amazed. His mom, Dr. Ona Colasante is a bonafide homesteader.

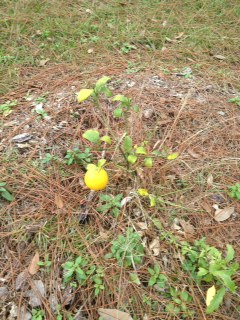
As a family practice physician, Ona is very considered with her health and the health of her family. She therefore chooses to grow as much of their food as she can. Her impressive garden was just expanded to include fruit trees. The tiny lemon tree pictured below has fruited in both it’s first and second years of life!

Image

Also in the orchard are peach trees that I was fortunate enough to consume the last frozen bath of. Wow. The blossoms are beautiful in the early spring (seen below).

Image

Ona consumes a vegetarian diet of mostly her vegetables or goods from her local farmers market. Besides the garden, she practices several homesteading classics. My favorite being the chicken coop. Her laying chickens are extremely vocal and produce about 10-15 eggs per day! She’s able to regularly give some away to friends and family. The chickens also help contribute to Ona’s almost nil amount of waste. Anything she doesn’t eat goes to the chickens. What the chickens don’t eat, the two enormous dogs consume. And what the dogs can’t eat (rinds, fatty foods etc) goes into the compost heap next to the garden. She takes pride in the fact that she only needs to change her kitchen garbage bag every other week or so.

Image

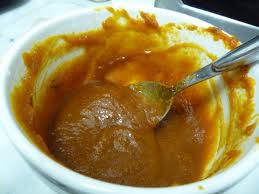
Ona’s impressive garden allows her to can, freeze and cook the fruits of her labor throughout the entire year. Continuously, she makes sauerkraut, canned peaches and pickles (I got her recipe for my next batch). Right now she’s experimenting with flavoring olives a friend brought back for her from California. One great thing about Ona is that she’s never afraid to try a new recipe.

When I asked her what her favorite part of the homestead is, she had a hard time deciding what she loved most. “Everything that I do makes me feel good, personally and as a part of the planet as a whole,” she said. But, she finally stated that she’s most excited about her recent addition of solar panels. She’s hoping that by 2015 at least 75% of her personal energy use will be renewable. Here, her dedication to a simpler life is apparent. Instead of using the money she’s saved from homesteading for consumption in other forms, she allowed it to accumulate in order to make energy efficient changes to her household. Extremely impressive.

Although she’s faced many hardships this year, Ona has yet to waiver from her life as a homesteader out of convenience. An incredible role model, I hope to one day build up a sustainable household such as hers. Her near zero waste approach to simple living is truly an inspiration.

Happy homesteading!

Natural Beet Dye

Who doesn’t love transforming old clothes into something you really want to wear again? I can’t tell you how many times old whites have had to be trashed because of stains or other discoloration. Instead of getting rid of them, dye them! Natural dyeing is fun and easy and a much better alternative to synthetic dyes you can buy at the store.

While modern day synthetic dyes often come in any color you can imagine and end u being very bright, the chemicals used to produce them are often extremely toxic, often flammable and some are even possible carcinogens. These chemicals are dangerous for anyone handling them; workers manufacturing the dyes are especially at risk. Dye factories and businesses using dyes often experience large fires (one happened right here in Rhode Island in 2003). In these dye factories, the water used to dye fabrics is cheaper to dump than to clean and re-use and has therefore become the preferred option for these companies. Although most countries require this industry to treat the water before dumping, the result is a separated extremely toxic sludge and a less toxic (but still slightly) water that is often dumped into natural waterways. The problem then becomes what do we do with the toxic sludge? Currently, much of it is stored in facilities and accumulating.

Aside from environmental consequences of synthetic dyes, many people are sensitive to chemicals used and have problems with skin irritation to them when they inevitably rub off on your skin after continued wear. Much of the above information was found on the Green Cotton, a company that takes pride in selling only unbleached, undyed cotton products, blog. The link to their site can be found at the end of this post.

The dangers of synthetic dyes made me question why we ever strayed away from the natural dying processes of antiquity. I’ve met several artists and fellow homesteaders who rave about their experiments with natural dyes so my roommate and I were excited to try it using beets. Follow these steps for a great result!

1. Whatever whites you’re using need to be prepped to absorb the dye. The way I did this was by combining 1/2 cup of salt and 8 cups of water in a large pot. Bring to a boil then add your clothes and reduce to a simmer. I had one large men’s t-shirt and a small tank top. The fabric should simmer in the water for at least an hour

Image

2. While the clothes simmer, prepare the beets. I used 3 fairly large beets in order to get a deeper color. These beets were hidden in our refrigerator for about a month and were extremely soft so probably would have been tossed when we finally remembered them. I chopped them into approximately one inch cubes and left the skin on.

3. After an hour in the salt bath, remove the clothes and wring them out thoroughly. Be sure to let them cool off sufficiently first.

4. I cleaned the original pot and then placed the wrung out shirts back in and proceeded covered them with cold water and threw in the beets. Bring this pot to a simmer and leave for at least an hour. If left for longer, the color will get slightly darker. You’ll be able to see the color being released into the fabric.

Image

5. Remove the clothing from the pot and wring out after letting cool. Hang to dry. That’s it!

Image

We ended up with a very beautiful peachy orangey color and the beet water that went down the drain was much better than its synthetic dye equivalent.

Happy homesteading!

http://greencotton.wordpress.com/2008/06/18/synthetic-dyes-a-look-at-the-good-the-bad-and-the-ugly/

All Purpose Cleaner

Cleaning products is one thing I feel everyone knows have an environmental impact. They contain hazardous chemicals that kill enormous amounts of good and bad bacteria. It’s obviously important to keep your living expense clean, but at what expense to the environment? My household typically uses CLOROX Clean-Up in our bathroom.

Image

Only the active ingredient Sodium Hypochlorite is listed on the bottle, but the other ingredients make up for 98.16% of the product. Ingredientsinside.com give the full list of ingredients which include: Water, Dimethicone/Silica/PEG Distearate Antifoam, Fragrance (my least favorite ingredient on every list ever. What is used to make the fragrance!?), Lauramine Oxide, Sodium Hydroxide and Sodium Silicate

While the claim is that these heavy hitting chemicals are essential for the product’s effectiveness, their effect on our environment and ourselves is immense. These cleaning agents too easily leach into our environment and out of their containers. In many cases in history, components in cleaning products have been proven to be “too harmful” for the environment and end up banned by governments. However, many of these products sub-parts that have been recognized as very harmful continue to be used in manufacturing. Phthalates, which are used in the packaging of heavy chemicals because they can withstand decomposition for longer, have been shown to readily interrupt several developmental processes due to their estrogen mimicking properties. The United States government has acknowledged this research and begun to regulate industries in the disposal of the substance. However, companies are not restricted by any regulations regarding their use in consumer products, cleaning product packaging or use in cosmetics.

As more people become aware of this, there has been a large push for greener cleaning products. Still, companies have taken advantage of this trend and stamped some of their products as green when in fact, they often are not. There are companies doing the right thing and using environmentally sound components, but the average consumer may not think it is worth it to pay more for these products. For one of my homesteading experiments I decided to make my own all purpose cleaner to test whether or not all of those excess chemicals are really necessary.

I used: 1/4 C white vinegar, 2 T baking soda, 4 C hot water and 1 lemon.

Lemon and vinegar are both acidic and good for degreasing. They both upset pH balance, fighting bacteria. Baking soda is an alkaline and neutralizes the pH of surrounding environments so the combination of the three is great for cleaning.

Image

I combined the vinegar, baking soda and hot water and squeezed the juice of one lemon into the mixture. I left the lemon rinds in as the baking soda dissolved. After letting sit for about 10 minutes, I poured the mixture into an empty spray bottle.  I first took on our bathroom counter. Before and after pictures below (I’m truly ashamed of the before picture).

Image

Image

I got similar results with each surface I cleaner, even the annoying stain on the stove that’s been there for weeks. While the necessity for something stronger may be necessary for surfaces like toilet seats or things that have touched raw meat, I’m extremely pleased with how my cleaning spree turned out and so are my roommates.

Happy homesteading!

Homemade Body Scrub

Image

Winter isn’t approaching as quickly as it normally does, but I’ve still been noticing my skin beginning to dry out. Occasionally, I’ll use a scrub from Sephora called Sugar Crush made by the brand SOAP & GLORY. When I turned the jar around to look at the ingredients, I was disappointed with what this “natural” product contained. This list is as follows:

Glycerin, Sea Salt, Sucrose, Polysorbate 20, Glyceryl Stearate, Butylene Glycol, Sodium Chloride, Peg-100 Stearate, Caprylic/Capric Triglyceride, Sweet Almond Oil, Macadamia Integrifolia Shell Powder, Lime Oil, Dioctyl Adipate, Fragrance, Benzyl Alcohol, Castor Seed Oil, Stearalkonium Hectorite, Talc, Propylene Carbonate, Propylene Glycol, Bha, Propyl Gallate, Limonene, Linalool, Citral, Citric Acid, Ci 77492 (Iron Oxides), Ci 77499 (Iron Oxides), Ci 77491 (Iron Oxides).

Why should a scrub that is supposed to exfoliate and rejuvenate my skin contain so many alcohol derivatives, which notoriously have a drying effect? I thought about what happens to this scrub after it washes off of my skin and down the drain. These excess ingredients must then be filtered out of the water it has contaminated. Thinking of the main ingredients of this scrub and other things I had in my kitchen that I thought to have moisturizing properties, I devised my own scrub. In the photo above you’ll see the end product.

In my scrub:

About 1 1/2 cups brown sugar, 2 tsp cinnamon, 1 cup olive oil, 1 cup apple puree (just placed 1 1/2 apples in a blender with some water after removing the skin), 3 TB coconut oil

After mixing all ingredients together I applied the combination to my left leg and foot and used the Sugar Crush on the right side to compare. After rinsing, my left leg felt soft and also had a beautiful tint of color (from the cinnamon, I assume).The exfoliation properties of the homemade mixtures felt much nicer on my skin throughout the application and rinsing processes. My right leg felt soft for about 10 minutes after drying off and within 20 minutes it was clear I was going to need to apply lotion.

With a transition to a homemade scrub, I will no longer be washing glycerin, other alcohols and synthetic “fragrance” down my drain. I feel much better about exfoliating and will definitely not be going back to the store-bought scrub. The best part? My total amount of ingredient used cost about $3. The Sugar Crush brand goes for $20 at Sephora!

Happy homesteading!

Refrigerator Pickles

Image

My grandmother pickles everything. Probably the reason my mother hates pickles. Luckily that skipped me and pickles quickly became one of my favorite foods as a kid. After getting to college and buying my first jars of non-homemade pickles, I was perturbed by how soggy and old they tasted. There was barely any crunch or color to the Vlasic’s I bought. 

What I later found out, is that the waste water industrial cucumber pickling is characterized by: high chloride content, high oxygen demand, low pH, and high total and suspended solids. Not to mention the excessive amounts of water wasted used to accelerate production rates. The discharging of this pickle wastewater has potential to contaminate groundwater by run-off or seepage,making home pickling a much more environmentally and tasty option. 

For an exciting Saturday afternoon activity, I went to a friends house and we went to town on refrigerator pickling. I combined all of these things (except the water) in a mason jar and then once mixed together filled with water half an inch from the top. It’s not necessary to use exactly the vegetables I used, any veggie pickled tastes yum! For a spicier version, add jalapenos to the mix!

  • 2 pickling cucumbers (as many as you can fit in the jar)
  • 1 medium sized carrot 
  • half of a spanish onion 
  • 1/4 of a red pepper 
  • a few hunks of cauliflower 
  • 5 sprigs of fresh dill (or 1 Tbsp dry dill)
  • 2-4 cloves of garlic (or garlic scapes), crushed and minced (we use 4)
  • 3 Tbsp white distilled vinegar
  • ½ – 1 Tbsp kosher salt, to taste (I use ¾ Tbsp)
  • distilled or filtered water – enough to top off jar
  • 20 black peppercorns, optional 
  • ¼ tsp red pepper flakes, optional

(This is in each mason jar, I made a total of 8) 

The end result is jars of pickled veggies that after 2 shakings following a 12 hour rest period, are ready to eat! Although the total cost of my 8 jars of pickled veggies was slightly more than buying 8 jars of Vlasic dill pickles ($17 versus about $13), I used very little water in the process and plan to use my leftover pickle juice in a delicious dressing I make with plain yogurt and paprika. 

The entire preparation of these 8 jars of pickles took about 30 minutes, and are easily a better alternative to store-bought pickles and the process used to produce them. Not only that, but you should have seen the look on some of my friends’ faces when I gifted them a jar of these guys!

Happy homesteading! 

Nature’s Pace Organics

npo2

This past summer I had the pleasure of working at Nature’s Pace Organics, a small farm in Mayville, Michigan. While I learned countless things during my stay on the farm, The story and objectives of Jacob and Katie, the married couple that owns Nature’s Pace, is remarkable. They agreed for me to interview them for the blog. Here’s a transcript of our Skype conversation after a long catching up.

Dane: My blog is about homesteading, but you guys own a farm. What things do you do that would be considered homesteading and not farming?

Katie: Well, our end goal is to downsize from 20 acres to a 4 acre homestead. Financially, it was less risky to acquire more land in order to produce a yield that we could sell instead of consuming and storing for ourselves. But besides our (hopefully near) future as a full blown homestead, there’s tons of stuff we do that would qualify. It’s a rare week when I need to go to the grocery store for anything. We’ve canned and stored and frozen so much of what we and friends of ours have produced or hunted for years. I make cheese from our goats, eat eggs from our chickens, and tinctures and home remedies from our herbs. You know I make kombucha because we’ve made it together! My new favorite thing is making kefir before Forrest (their 6 year old son) loves it.

Dane: People tend to think that homesteading is difficult and extremely time intensive. What do you think?

Katie: There’s so much information out there today that it’s almost impossible to have a hard time learning how to do something. Nothing I’ve tried so far has been impossibly hard and after doing it once, you’ve got it down and can’t help but teaching all your friends. I think the time it takes is a good thing. I feel so much more connected to jam I’ve made myself with fruit from our trees than a jar you could buy at the grocery store. When you know your food and the values with which it was created, you feel better, more whole in a way.

Dane: Can you tell me some of the environmental and human benefits to homesteading?

Jacob: The extensive amount of energy that goes into the production of things that require very little energy to make at home is remarkable. Giant plants run machinery for most of the day to make a jars of sauerkraut? It’s so easy to make sauerkraut! If people took a minimal amount of time to turn cabbage to sauerkraut (not even grow the cabbage), think how much energy could be saved. Starting a home garden, regardless of how small, is so environmentally and economically worthwhile if you want to put a little love into it. Your average packet of home garden seeds will cost you a few dollars and you get a much greater money’s worth in yield. Like Katie said, we feel so much better knowing the values that were used in the growing of what we eat. I can’t imagine that that’s much different for anyone else.

Katie: It’s been extremely valuable for our kids to watch all that we do and take part in our work. I think a lot of the reason more people don’t homestead is because they haven’t seen it in action. Teaching young people in settings such as ours is something I think could make a huge difference in our environment and especially our food system. Part of the reason I’m so glad you’re making this blog!

npo

Jacob and Katie were a huge inspiration to me this summer and increased my awareness of so many aspects of food and living simply. Their story is beautiful and one I am so happy I get to share with all of you.